Packaged terminal air conditioners, more commonly known as PTACs, are a combined self contained through the wall air conditioning and heating unit. Commonly found in hotels and motels, PTAC units are useful for a wide variety of applications including apartments, nursing homes, sun rooms, dorms, offices, and more. Commercial grade reliability and warranties make these a safe choice for any use.
One of the many benefits of PTAC units is how easy they are to replace. Once you check a few details, you can easily select the correct new unit and be on your way to comfort.
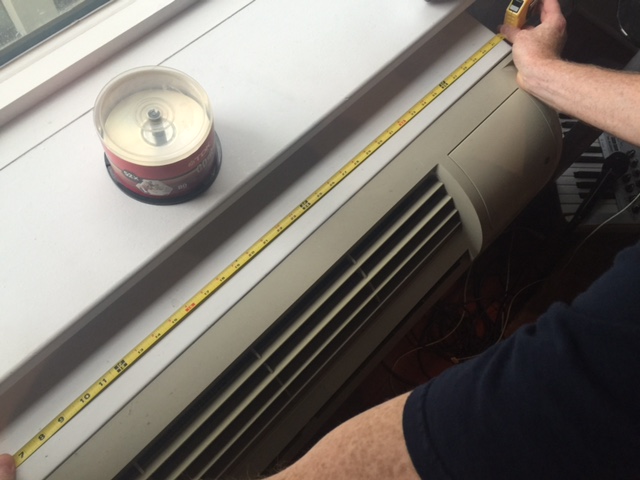
Measuring and Size
The first thing to consider when looking for a replacement PTAC unit is the size. The industry standard size for a PTAC is 42 inches wide by 16 inches high. These are the outside dimensions of the sleeve. Depth can vary. The measurement should be taken from the outside of the wall sleeve or case that is mounted in the wall. The wall sleeve holds the unit. Most wall sleeves are 14 inches deep while most units are about 20 inches deep. As long as your wall sleeve is 42" x 16" you should be able to use a standard PTAC unit.
Other Sizes
Another size that can sometimes be referred to as a mini PTAC is 26 inches wide by 15 ⅝ inches high. Many air conditioners are made to fit this size including some models that also offer heating. Refer to our website to select an appropriate replacement. If your unit is not one of the sizes listed above or if it uses gas in addition to electricity, then it may be more difficult to replace. While we do not carry these products, here are some brands that make specialty replacement PTAC units:
- Applied Comfort Products
- Islandaire
- Comitale National
- Evergreen Products
Determining BTUs
BTUs BTU stands for British Thermal Unit and is a unit of measurement used to determine the amount of heating and/or cooling energy a heater or AC is capable of expending. Most cooling product listings will indicate BTU per hour, or BTU/hr, which simply refers to how much energy is expended in one hour of use. The higher the BTU listed for a product, the more space that unit is capable of heating or cooling in one hour. represent the amount of heating and cooling power that a unit has. The size of your room, construction type, insulation, windows, and doors factor into how many BTUs are needed for your space. If you have an existing unit, the best way to determine how many BTUs you need is to look at your old unit. Many will list this information on the plate located under the front panel. You can see this information highlighted in the images below.
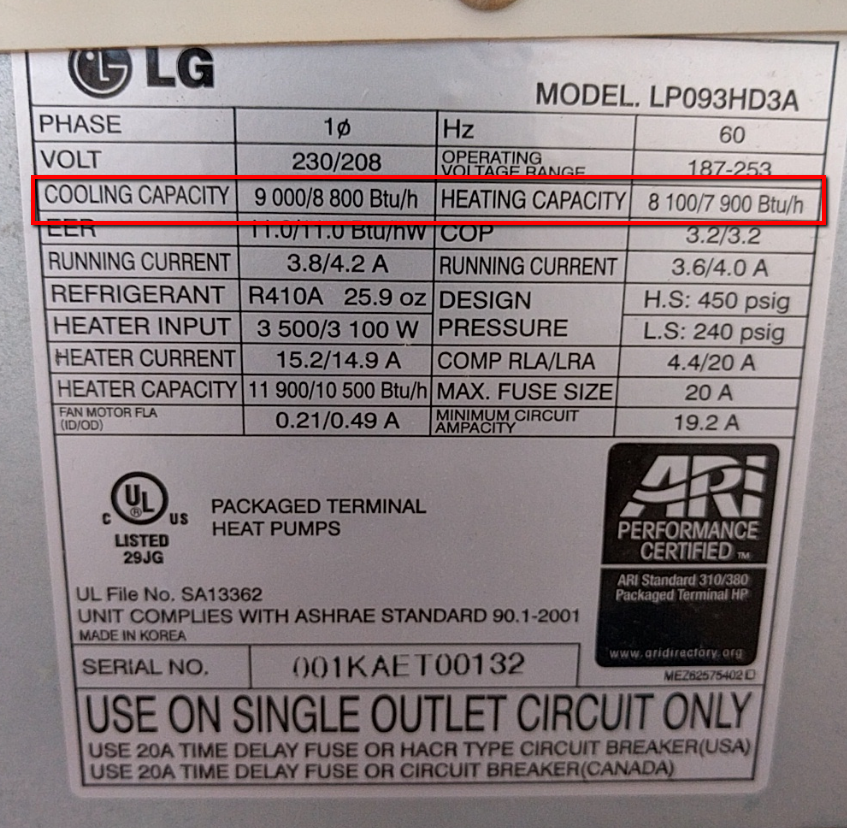
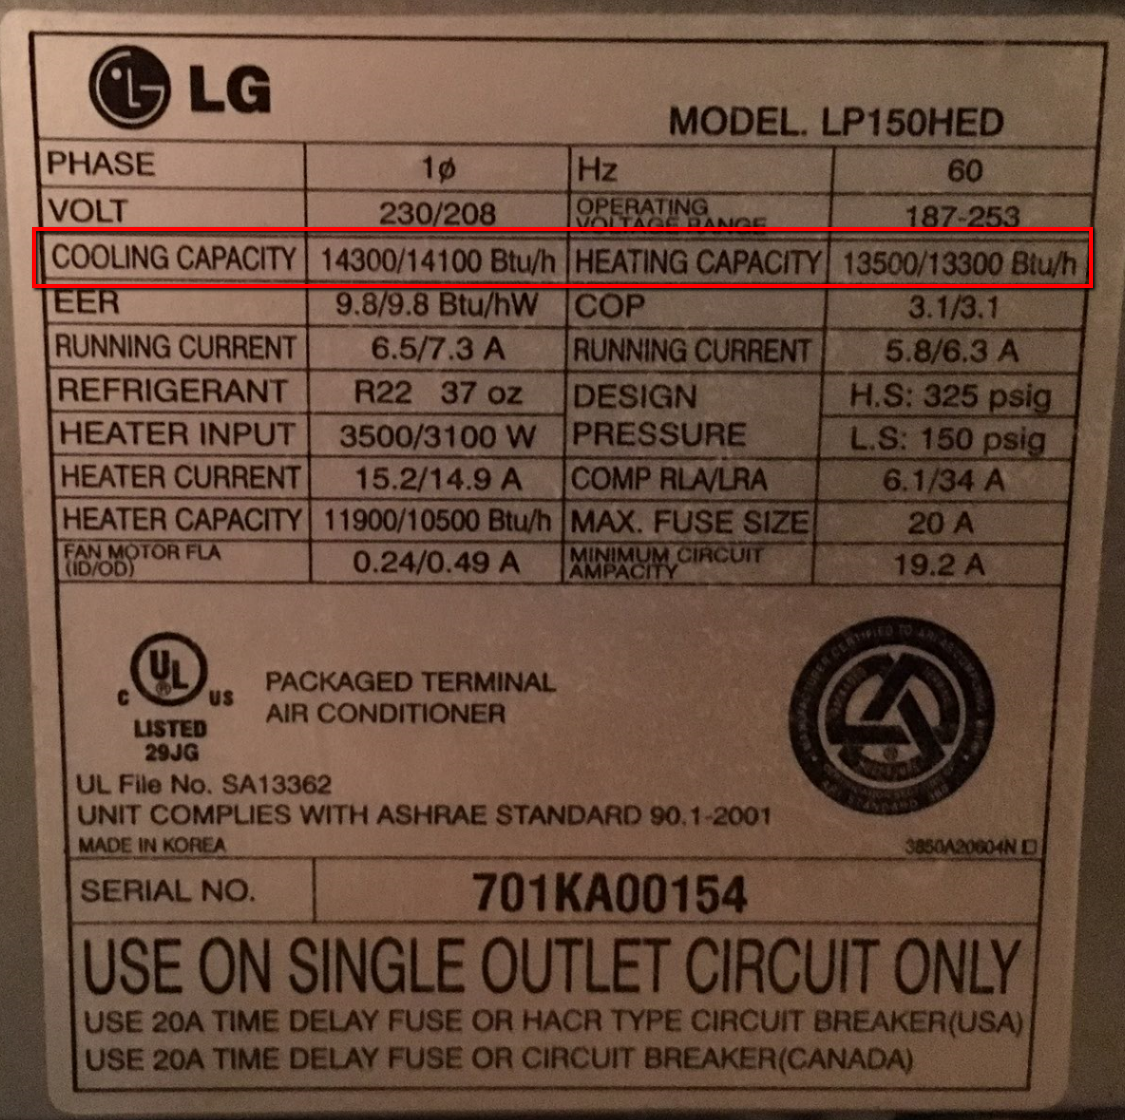
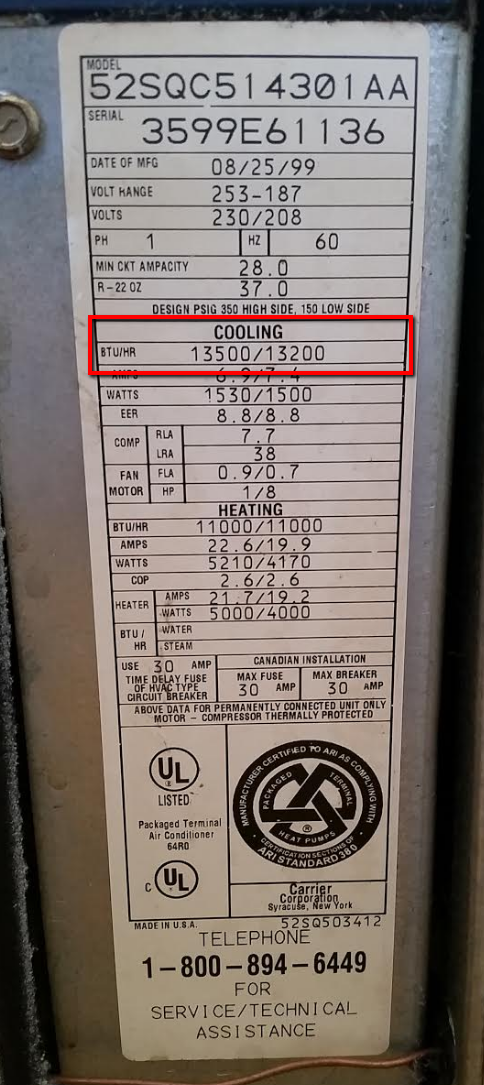
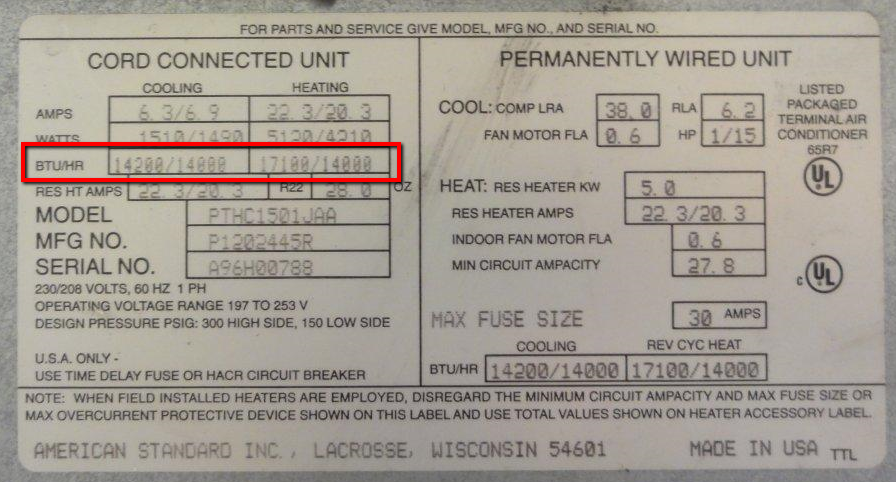
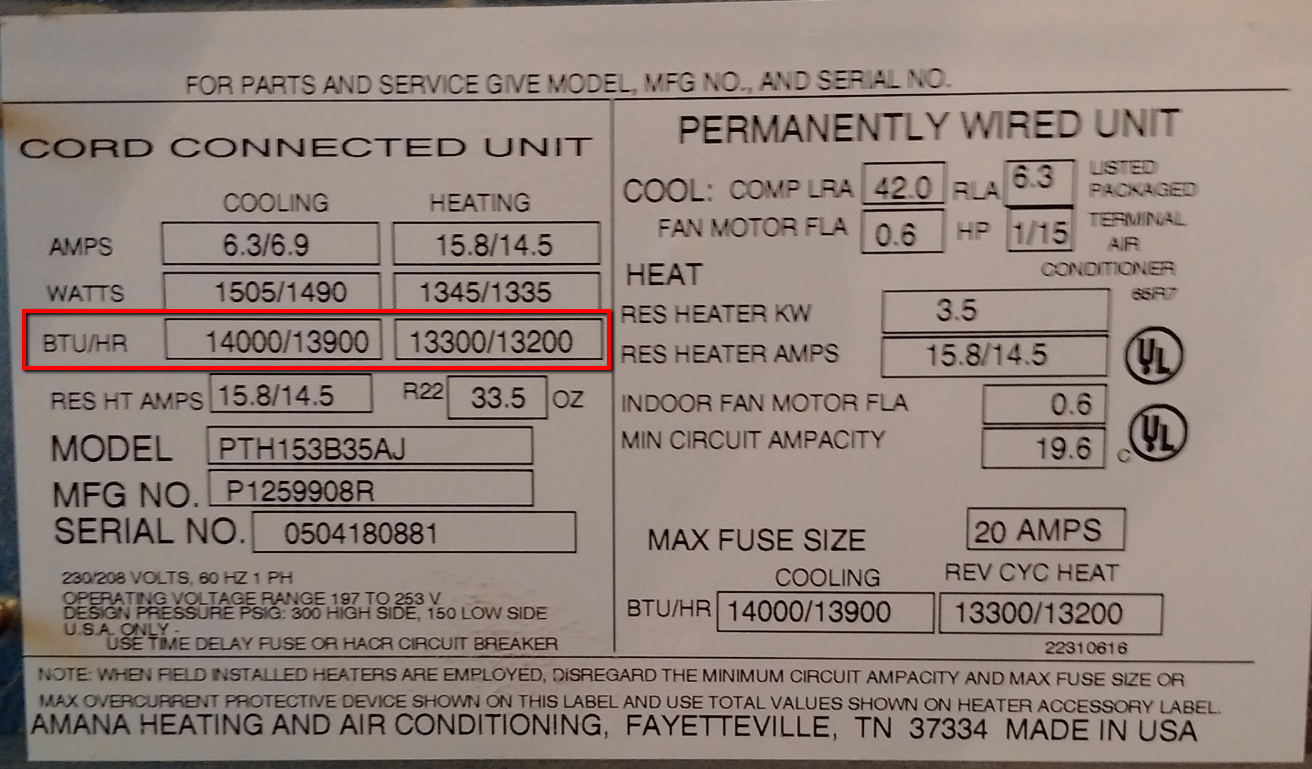
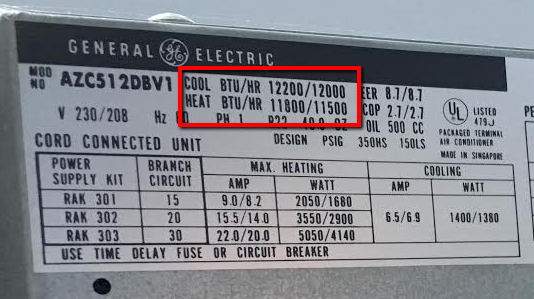
If you are unable to locate this information on your existing unit, you can use our BTU calculator to determine what is needed.
PTAC Units are broken down into four "classes" of BTUs. Every manufacturer offers something close to:
- 7,000 BTU Class PTAC Units
- 9,000 BTU Class PTAC Units
- 12,000 BTU Class PTAC Units
- 15,000 BTU Class PTAC Units
If your old unit was 14,200 BTUs you would want to go with a replacement that is in the 15,000 BTU class.
Electric Heat vs. Heat Pump
The next step is to consider the type of heating you want. All standard PTAC units we offer have both heating and cooling built in. Electric heat is included on all models. Some units will have a heat pump in addition to the electric heat. Heat pumps are more energy efficient using on average 60% less power to produce the same amount of heat. Heat pumps are a little more expensive to purchase. They work when the outside temperature is above about 35° F outside. Once it drops below 35° F the unit will automatically switch over to the electric heat so that you will never be without heat. In most climates, heat pumps will pay for themselves in energy savings quickly.
Electrical Requirements
Voltage
PTAC units require either 208/240 volt or 265/277 volt single phase power. If your unit is installed in a home or other residential application, the power will always be 208/240 volt. You can check the voltage of your unit by looking at the same information plate that the BTUs are found on.
Power Cords and Amps
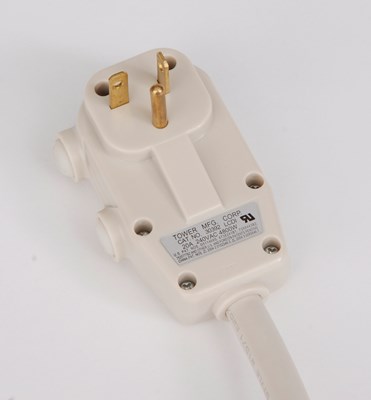
Besides the voltage, you will also need to know how many amps your unit is. The best way to verify this information is to check the breaker in your electrical panel and see what it says. Units will either be 15, 20, or 30 amps. Alternatively, you can also usually tell how many amps your unit is by the power cord or receptacle. Look at the below examples for each amperage.
15 Amp
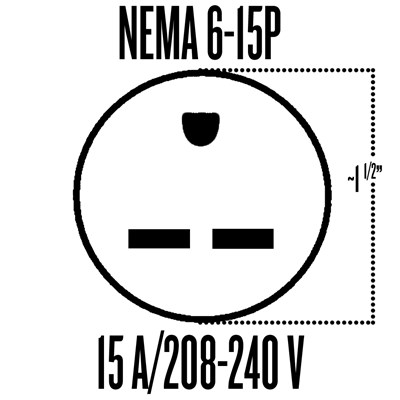
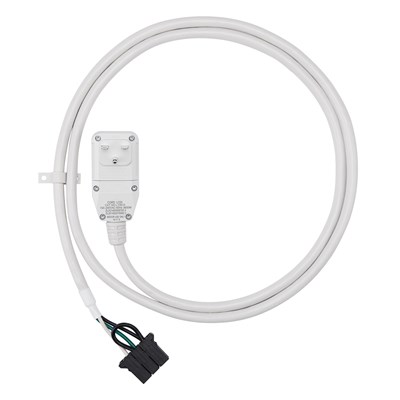
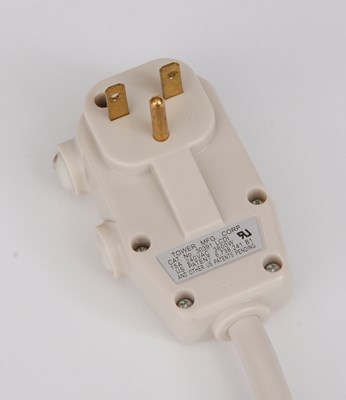
20 Amp
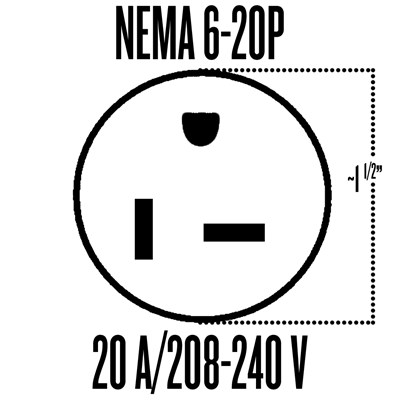
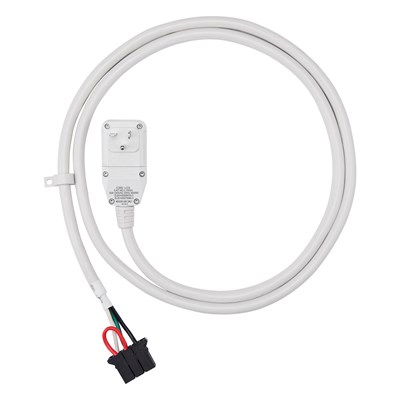
30 Amp
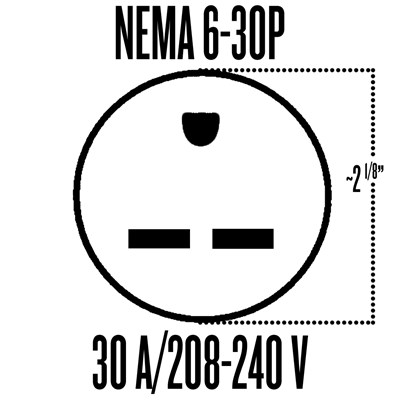
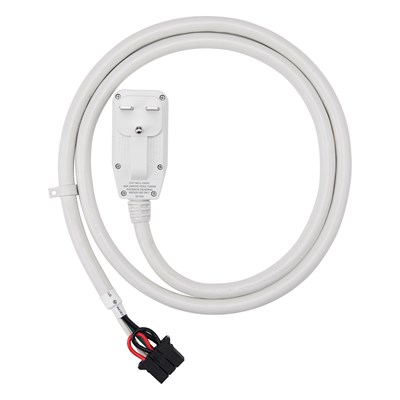
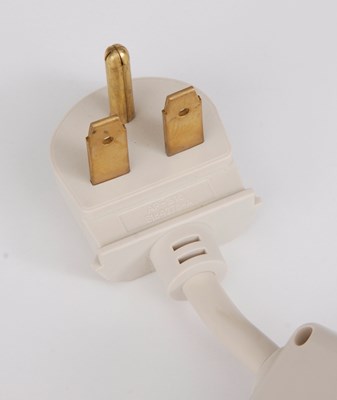
Some Friedrich units and all GE and LG units offer power cord options. This means that you can choose the power cord you need and easily attach it to your unit. These options are available to select when purchasing your unit. Amana and Hotpoint units come with the power cord pre attached. This means that you must order the correct unit/power cord combination. Each unit can be ordered in 15, 20, or 30 amp versions.
Available Units
We carry products from GE, Amana, LG, Hotpoint, and Friedrich. Once you know how many BTUs you need as well as your electrical requirements, click on one of the links below to browse through the available units that meet your needs.
How to Install a Replacement PTAC Unit
Installation is simple. As long as your wall sleeve and rear grille are in good condition, they do not need to be replaced. Simply follow these steps:
Step 1
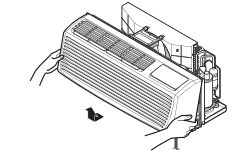
Step 2
Step 3
Step 4
Step 5
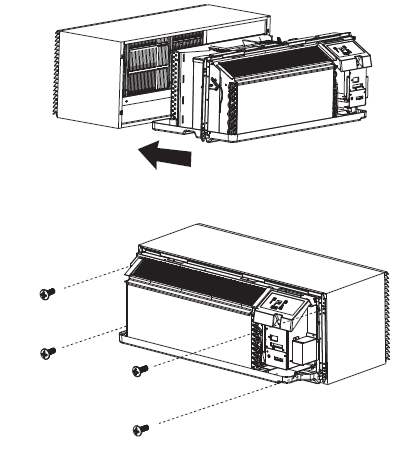
Step 6
Refer to your installation manual for further details regarding any additional accessories you may want to install. Be sure to check out our post on what to do with your old unit.
Get Help
Still not sure which unit is right for you? If available, be sure to check out the PTAC unit reviews, or just give us a call or drop us a line and we’ll make sure you get the right one.

